Tag Archives: basket

Crochet Fabric Yarn Nesting Baskets

Baby Nesting Baskets

I chose this design for a cute little round basket with a single handle. I bought lots of balls of fabric yarn in bright colors to choose from. And while I was experimenting with the design, some came out a little bigger and some a little smaller, depending on which type of strand I used. Where I buy fabric yarn, the strands are each different, because they are made from textile factory leftovers.  I think that counts as a certain level of recycling!
Anyway, I noticed that the smaller ones fit very nicely into the bigger ones – and I had fun mixing and matching them into these duos.
Two lone but determined wildflowers springing up from the lawn were in full agreement with the little baskets: It’s definitely spring.

5-2014-2-canon 1453-2014-2-canon 148 4-2014-2-canon 1448-2014-2-canon 152-0031-2014-2-canon 142 2-2014-2-canon 1841-2014-2-canon 1863-2014-2-canon 1835-2014-2-canon 181

Advertisement
fabric yarn basket

Blue Basket With Flowers and Trim

Since my first two little baskets, I have crocheted so many baskets with fabric yarn, and un-crocheted even more!  Wait, that doesn’t make sense… But that’s how it seems.  Fabric yarn is so quick and easy to unravel, that whenever I don’t like the outcome I just pull and undo it, and remake it a little better… Or maybe change the type and color of the trim.
But if I get past the immediate urge to unravel the imperfect, or if by chance it comes out perfect, I place the finished basket somewhere ‘just for now’, and something strange begins to happen… The fabric yarn I just finished crocheting sends off little rootlets into the table or the shelf… The roots grow into the surface, deepening their hold (they do this especially at night), and when I want to move the basket, I discover it’s too late, it’s impossible to detach it from where it has been standing.
There is only one way to get around this (that I know of), and that is, when you crochet the basket for someone special. There will be a lot of unraveling and redoing, but when it’s finished, the roots will wait to grow until they reach that person’s house.
So now, it’s just a matter of finding the right flowers to go with the basket.2014-2-canon 167
I have had two opportunities to make such a basket for two special someones, and it was such a nice feeling to see them growing roots in their new home. Well, I didn’t try to lift them from their place but I assume it’s the same on any surface.
IMG_20140802_172537095This picture was taken by my niece N. (we were running a little low on daylight, but I think the lighting gives it atmosphere…).

These two baskets (they are two different ones, although they look the same…) were made by single-crocheting blue fabric yarn in a spiral for the base, then continuing straight on for the sides. Once you have a low-rimmed blue bowl, you finish it off, and start to crochet the flower rows. My green and red strands were slightly thinner than the blue, so I think I may have used a slightly smaller hook. This serves well for the rounding in of the basket. You start with the stems in green: Two half double-crochets in a stitch, then skip one (you need to have an even number of stitches, which you will if you start the base with an even number of single crochets into the magic circle). For the next row, you crochet a red half double crochet into a pair of green hdc’s, right between the stems – then chain stitch, and so on all around. For the trim, you use a lacy strand of fabric yarn. You start by slip-stitching the strand to the space between two red hdc’s, then chain-stitching (I think 4 ch st), and slip-stitching again in the next space, and so on all around.
2014-2-canon 160
If you start with a tail to the thread and end with one, you can pull those tails through to the outside of the basket to make a bow, or just tie in a loose knot and let the strands hang down so their laciness shows.
2014-2-canon 161
If you put a flowerpot in the basket, be sure to use a base for it, and if you want cut flowers or a little flower arrangement, make sure it’s in a bowl!

fabric yarn basket

Chunky Gray Basket With Trim

I had this broad-band gray knit strand.
It wasn’t quite as soft and cottony as t-shirt yarn, so I thought this was a good chance to make a biggish and firm rug. Or basket. Or rug. I started single-crocheting around in a spiral with my no. 15 hook, stretching out the loops at the end of each stitch to make sure it didn’t round in and I could postpone the decision of whether it would be a rug or a basket until… That was it, and it was time to go up now – or forever be flat on the ground. I went up, and crocheted around the edges until the fab-yarn* ran out. Luckily the sides were just tall enough to keep a something in the basket.
2014-2-canon 224 1 edI then pulled out the pink strand with black polka dots. It was just right for the trim, which I made in the reverse single crochet stitch (rsc). There was enough left for a cute bow tie. I know it’s a little too much but I couldn’t resist it… Pink polka dotted yarn has a certain effect on me.
2014-2-canon 239 1 edBy now I’d decided the something in the basket would be pomegranates.
I started with two beautiful ceramic pomegranates (made by Ayelet, like all the beautiful ceramic art in my photos). One of the pomegranates has a dusty pink shade that reflected the pink strand nicely.
2014-2-canon 224 edPomegranates are in season here and they are a symbolic fruit for the coming Jewish New Year, too.
The two ceramic treasures were joined by some real ones.
2014-2-canon 238 1 ed

Can you tell them apart?

2014-2-canon 242 1 edIf only the new year could be as sweet as pomegranates!
Just a thought: Have you ever considered the fact that seeding a pomegranate has much the same appeal as crocheting? As the little chunks of bright color gather at your fingertips, they make you want to keep at this pleasant task by sending some secret signal to our hunter-gatherer brain that says, “keep gathering those little berries… Roots… Seeds… Soon your family will be fed and you will be happy.”
The pomegranates are delicious (the edible ones). 2014-2-canon 244 1 ed

*Fab-yarn is a term I invented, it’s short for fabric yarn, and if it hasn’t been invented before, I get cheers and claps – but only if it catches. I’ll Google it in a few weeks (or years?) and we’ll see if it’s out there!

pink and blue fabric baskets

Little Pink and Blue Baskets

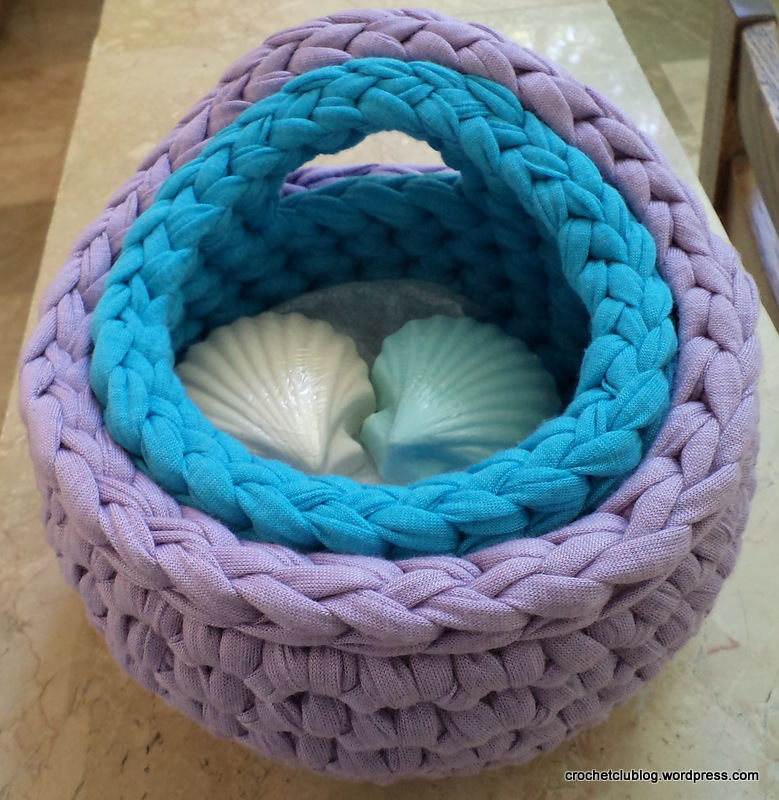
This was my first finished project in fabric yarn. I had started a rug from recycled shirts, but I ran out of old clothes to recycle and had to go buy some ready-made fabric yarn. The thread was soft and high in cotton fiber, the colors were delightful, and I was on my way to a double-birthday coffee meetup… So I decided to make two little baskets to give my two friends. I knew how to crochet from ages and ages ago, so I thought – okay, same thing, just a bigger hook and thicker thread. Almost…
I used a 9-10 hook.
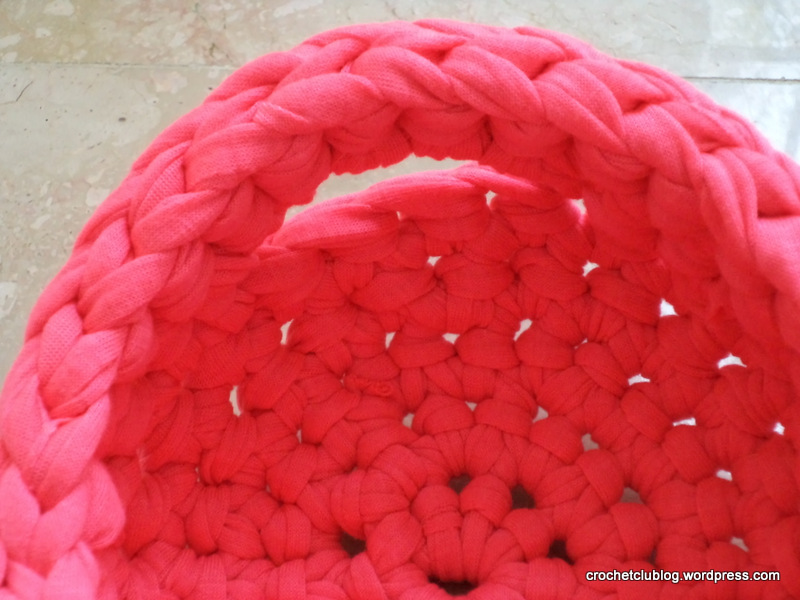
I made a magic ring, then single crocheted into it and started going around in a spiral. For the blue basket, I crocheted inside the stitches (the usual way), and for the pink basket, I crocheted into the back of the loop. I increased intuitively, creating a small flat base (usually, increases for double crochet are about 6 per row). When the base was big enough (about 15 cm, I think) I stopped increasing and just crocheted around till the basket was tall enough (about 6-7 cm). I closed the spiral by crocheting the last couple of stiches a little more tightly, and then made one or two slip stitches – to gradually decrease the height of that last row and close it off. The last stitch was an invisible join.

I discovered the special thing about fabric yarn: If it’s made from jersey – t-shirt fabric or the likes, it has that bit of a stretch, which makes it tighten a little at the top. In other words, it wants to be a little round basket. It keeps rounding itself as you crochet, even if by sheer math you have the right amount of stiches to create a flat base or straight-up row.
Perfect for the job!

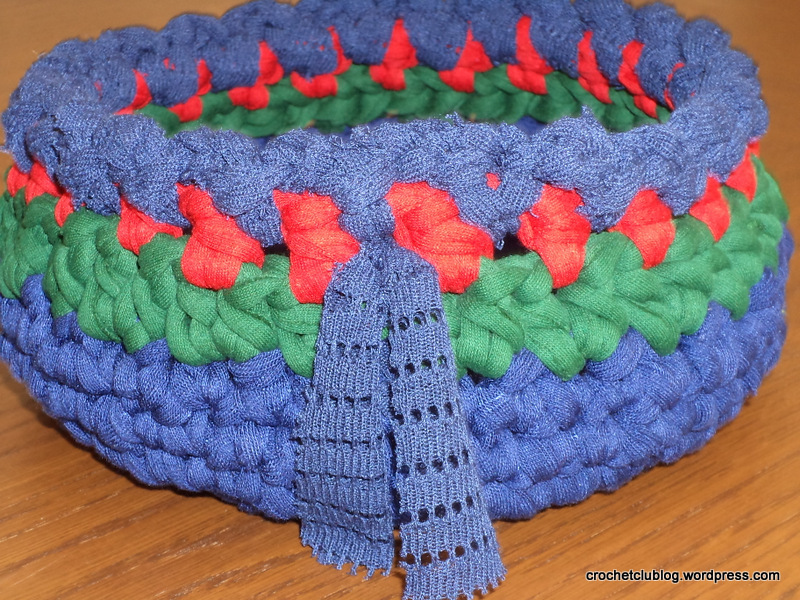
Still, when I got to the top, I slip-stiched a trim, and decreased a couple of stiches to make it close in a little more. For the blue basket, I used the right side of the work for the outside, the “normal”‘ way. For the pink basket, I turned it inside out and used the backside for the outside – that’s because crocheting in the back loops made the spiral too visible for my liking.  But the back side was cute, it looked round and pearly.

image_2

image_1

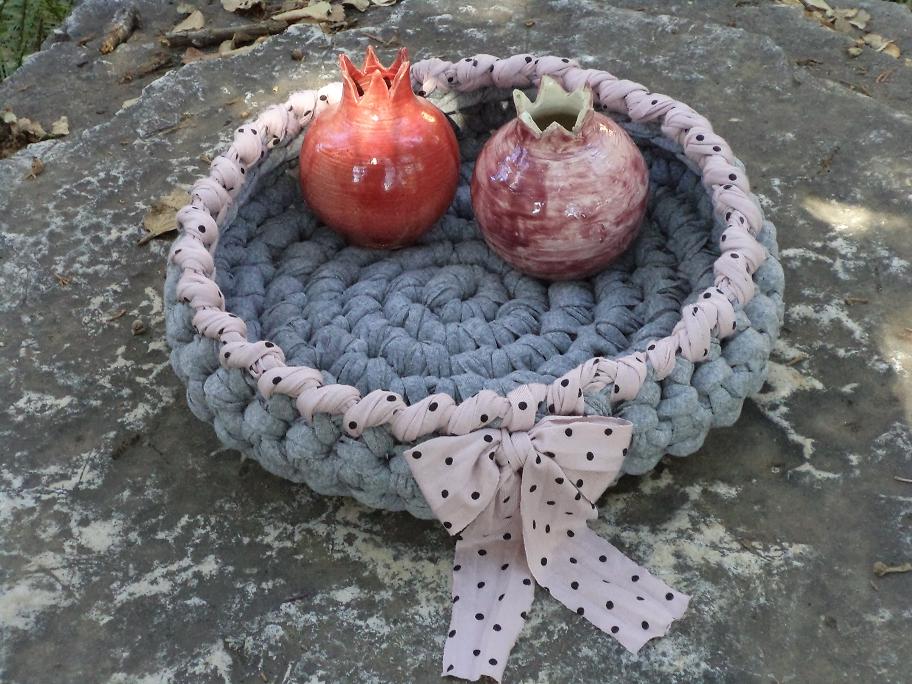
I had the ends of the trim thread left, and so instead of weaving them in and cutting, I used them to tie a small bow for embellishment. The ribbon conveniently hid the end point of the spiral, which despite my camouflage efforts, did show a tiny jump in height.

The hook was okay for the thread, but created a pretty tight “fabric”. If the thread had been any thicker, I would have needed a bigger hook. But the tight texture of the finished fabric was so cool, it made the basket pretty sturdy, and yet it had the softness and flexibility of the cotton knit it was made from. It made me think of a traditional straw basket – and I think that’s part of the appeal of fabric crochet.

And the reason I became immediately hooked!

image_4

(Oh, I was running late to the coffee meetup, so I just grabbed the camera and snapped this in pretty dusky lighting… I hope my next photos will be better).

Dear reader: This content on this blog is copyrighted. You are welcome to make a similar crochet project if you like my work. But please do not copy text or images without my permission – use the link if you want to share! Thank you.