Tag Archives: trapillo

Crochet Kitty Basket from T-Shirt Yarn

How Old is Eleven?

How old is eleven? Not too old to receive a Kitty basket!

20160916_164248-1-2

The idea for this basket came about a while back, when my niece M.’s birthday was still quite far off. I was crocheting a roundish basket with fabric yarn, and when I looked at the shape, or rather, when I felt the shape in my hands, I found myself thinking: If only this were in white… And had ears and whiskers… You see where I’m getting to.

But when M.’s birthday was nearing, I stopped to wonder for a moment – is eleven still okay for this? You know, eleven – old enough to babysit the neighbors’ kids, and understand a lot of things, and make beautiful drawings and handicrafts, and help around the house…

The answer I gave myself: Of course!

Crochet Kitty Basket from T-Shirt Yarn

I made a white, roundish basket, then made ears, and eyes, and whiskers, and a little bow. It was such  fun to make, and fun to give! And judging from M.’s response, I think I got the answer right.
Probably, not a moment too soon…

20160916_163808

Some Tips for Making a Kitty Basket:

The basket was crocheted in yarn under single crochet stitch (a favorite stitch with me), using a size 10 hook and white fabric yarn. The basket was formed by crocheting in a spiral.

The ears were crocheted separately and stitched on with fabric yarn (at just the right angle…)

The eyes and nose are cut from felt, and sewn on (you could probably paste them on with glue).

The whiskers were stitched onto the basket (each whisker is a single, jumbo-size stitch), and the thread is an old glasses cord.

The bow is made from a scrap of fabric yarn.

Save

Save

Save

Save

Save

Save

Save

Save

crochet t-shirt yarn mandala trivet

Happy Mandalas

I find the parallel between the basic geometry of a crochet round and that of a mandala intriguing.  A humbler sister of the ritual mandala, the crochet mandala is nevertheless soothing and meditative to  make, and pleasing to the eye.

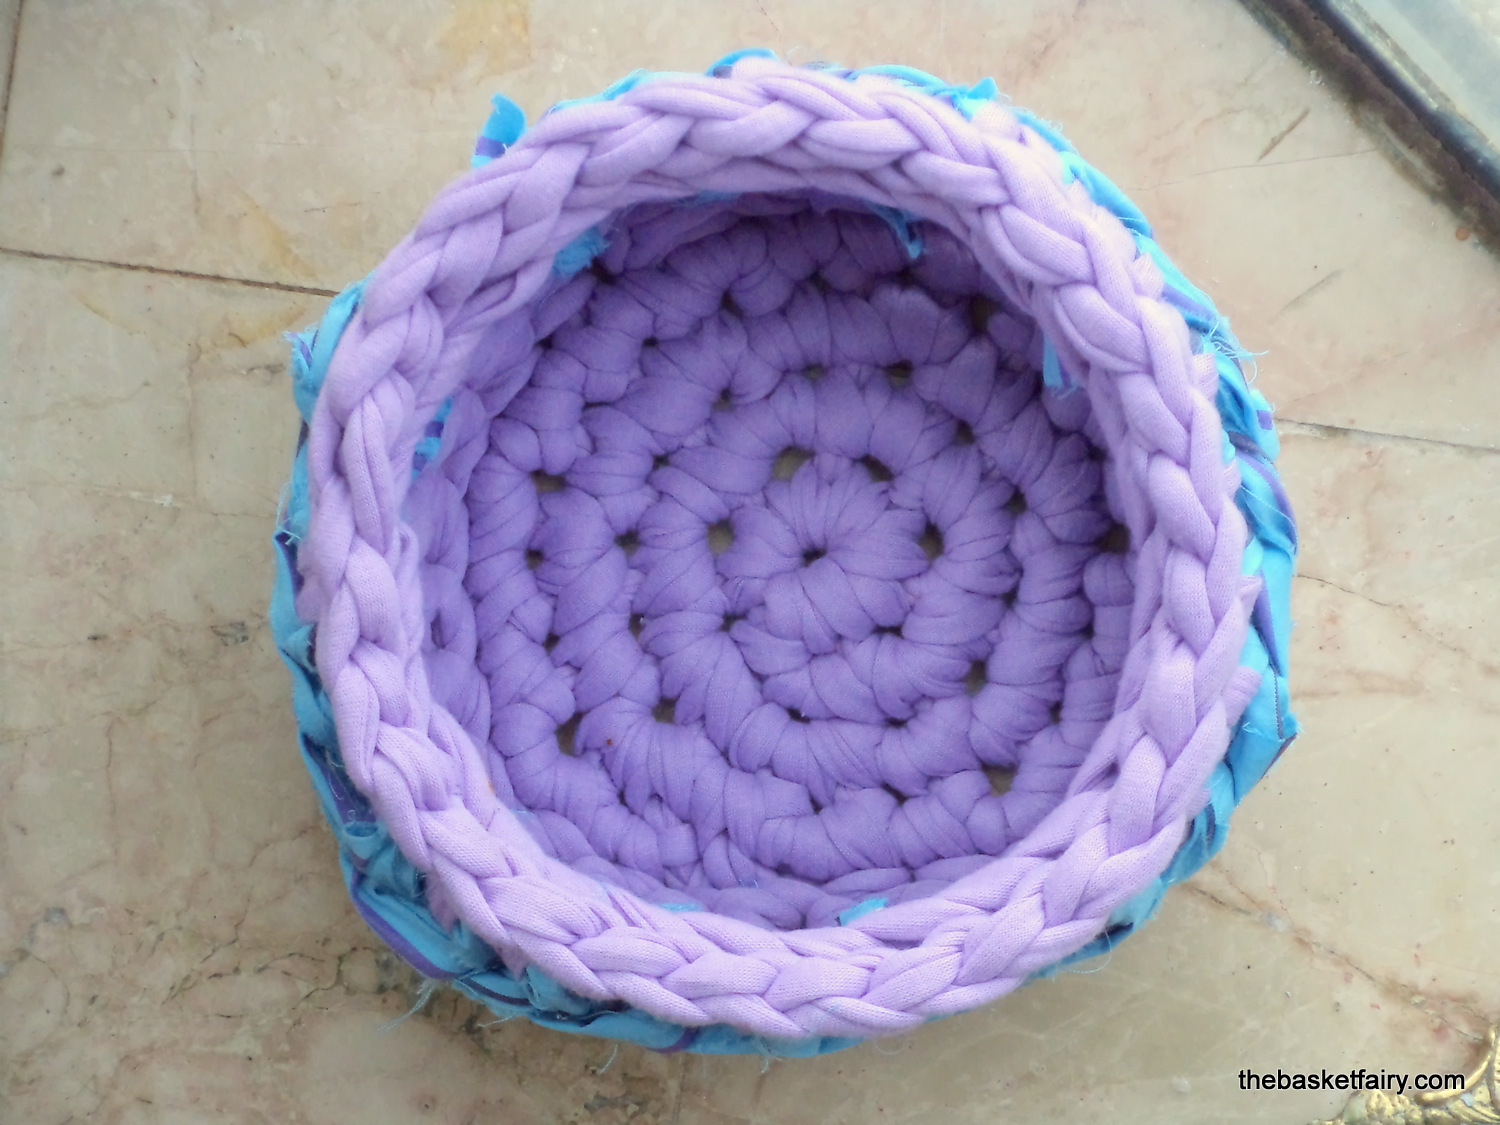
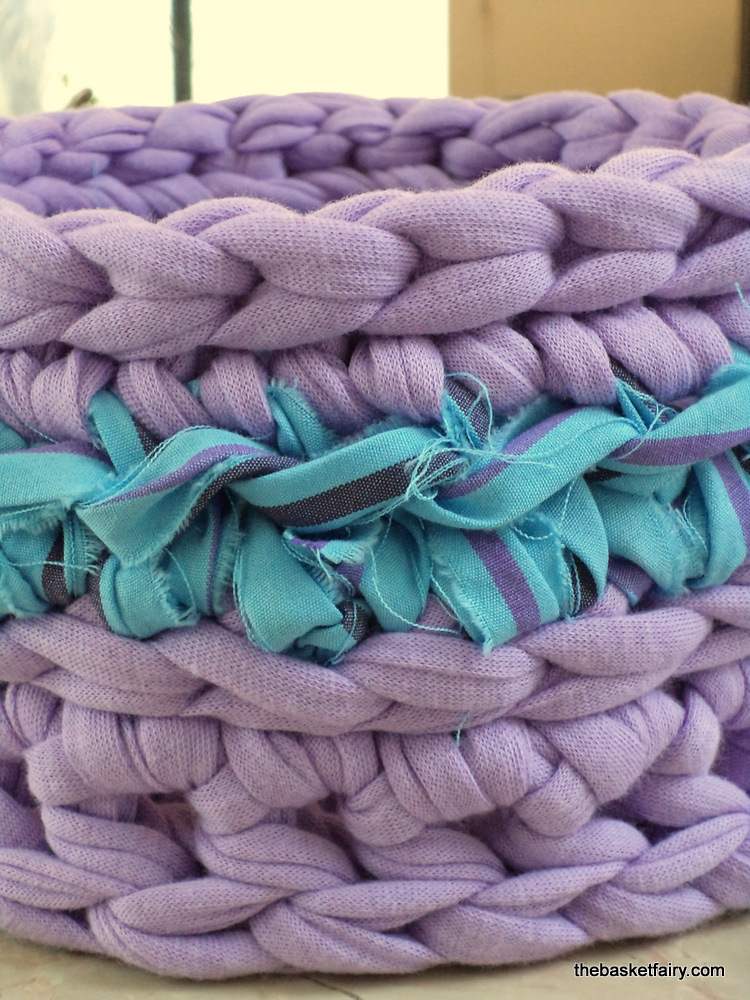
This simple mandala pattern is basic but priceless, because if you’ve got it mastered, you are on your way to making rugs, which are the same thing only bigger, and baskets, which are the same thing but with sides.

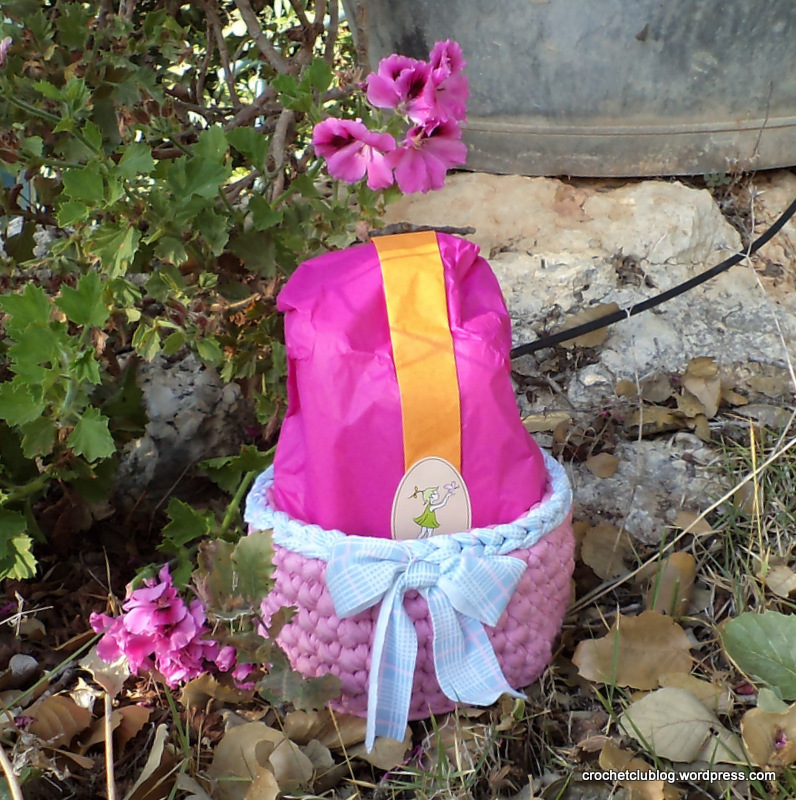
In the meantime, you can place your hot pan or kettle on it. Scatter a few and you’ll have a gay and festive table setting.

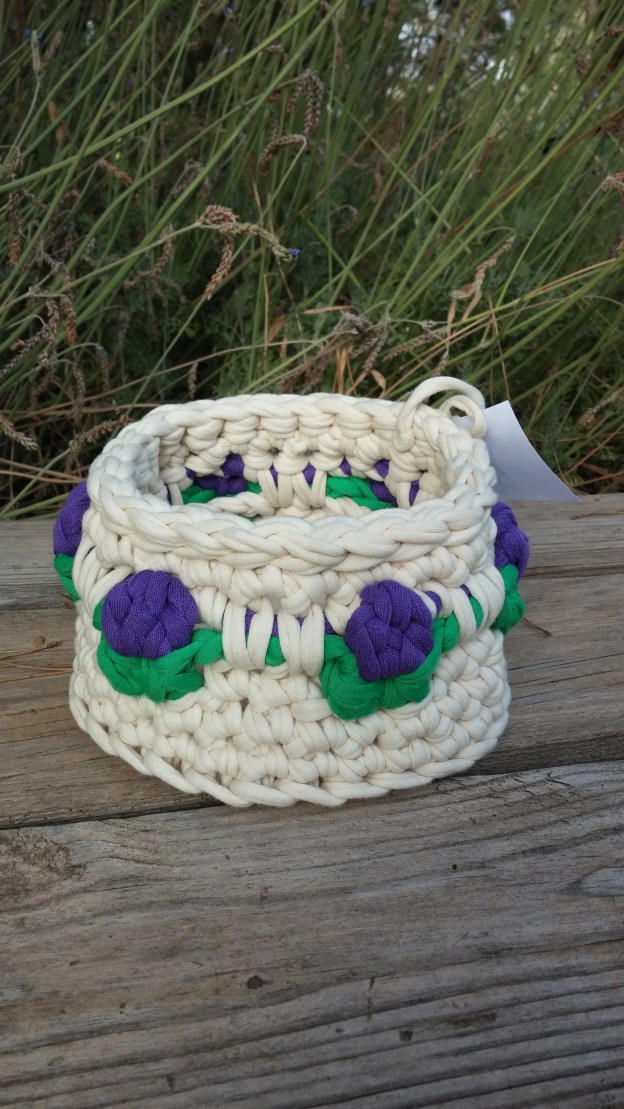
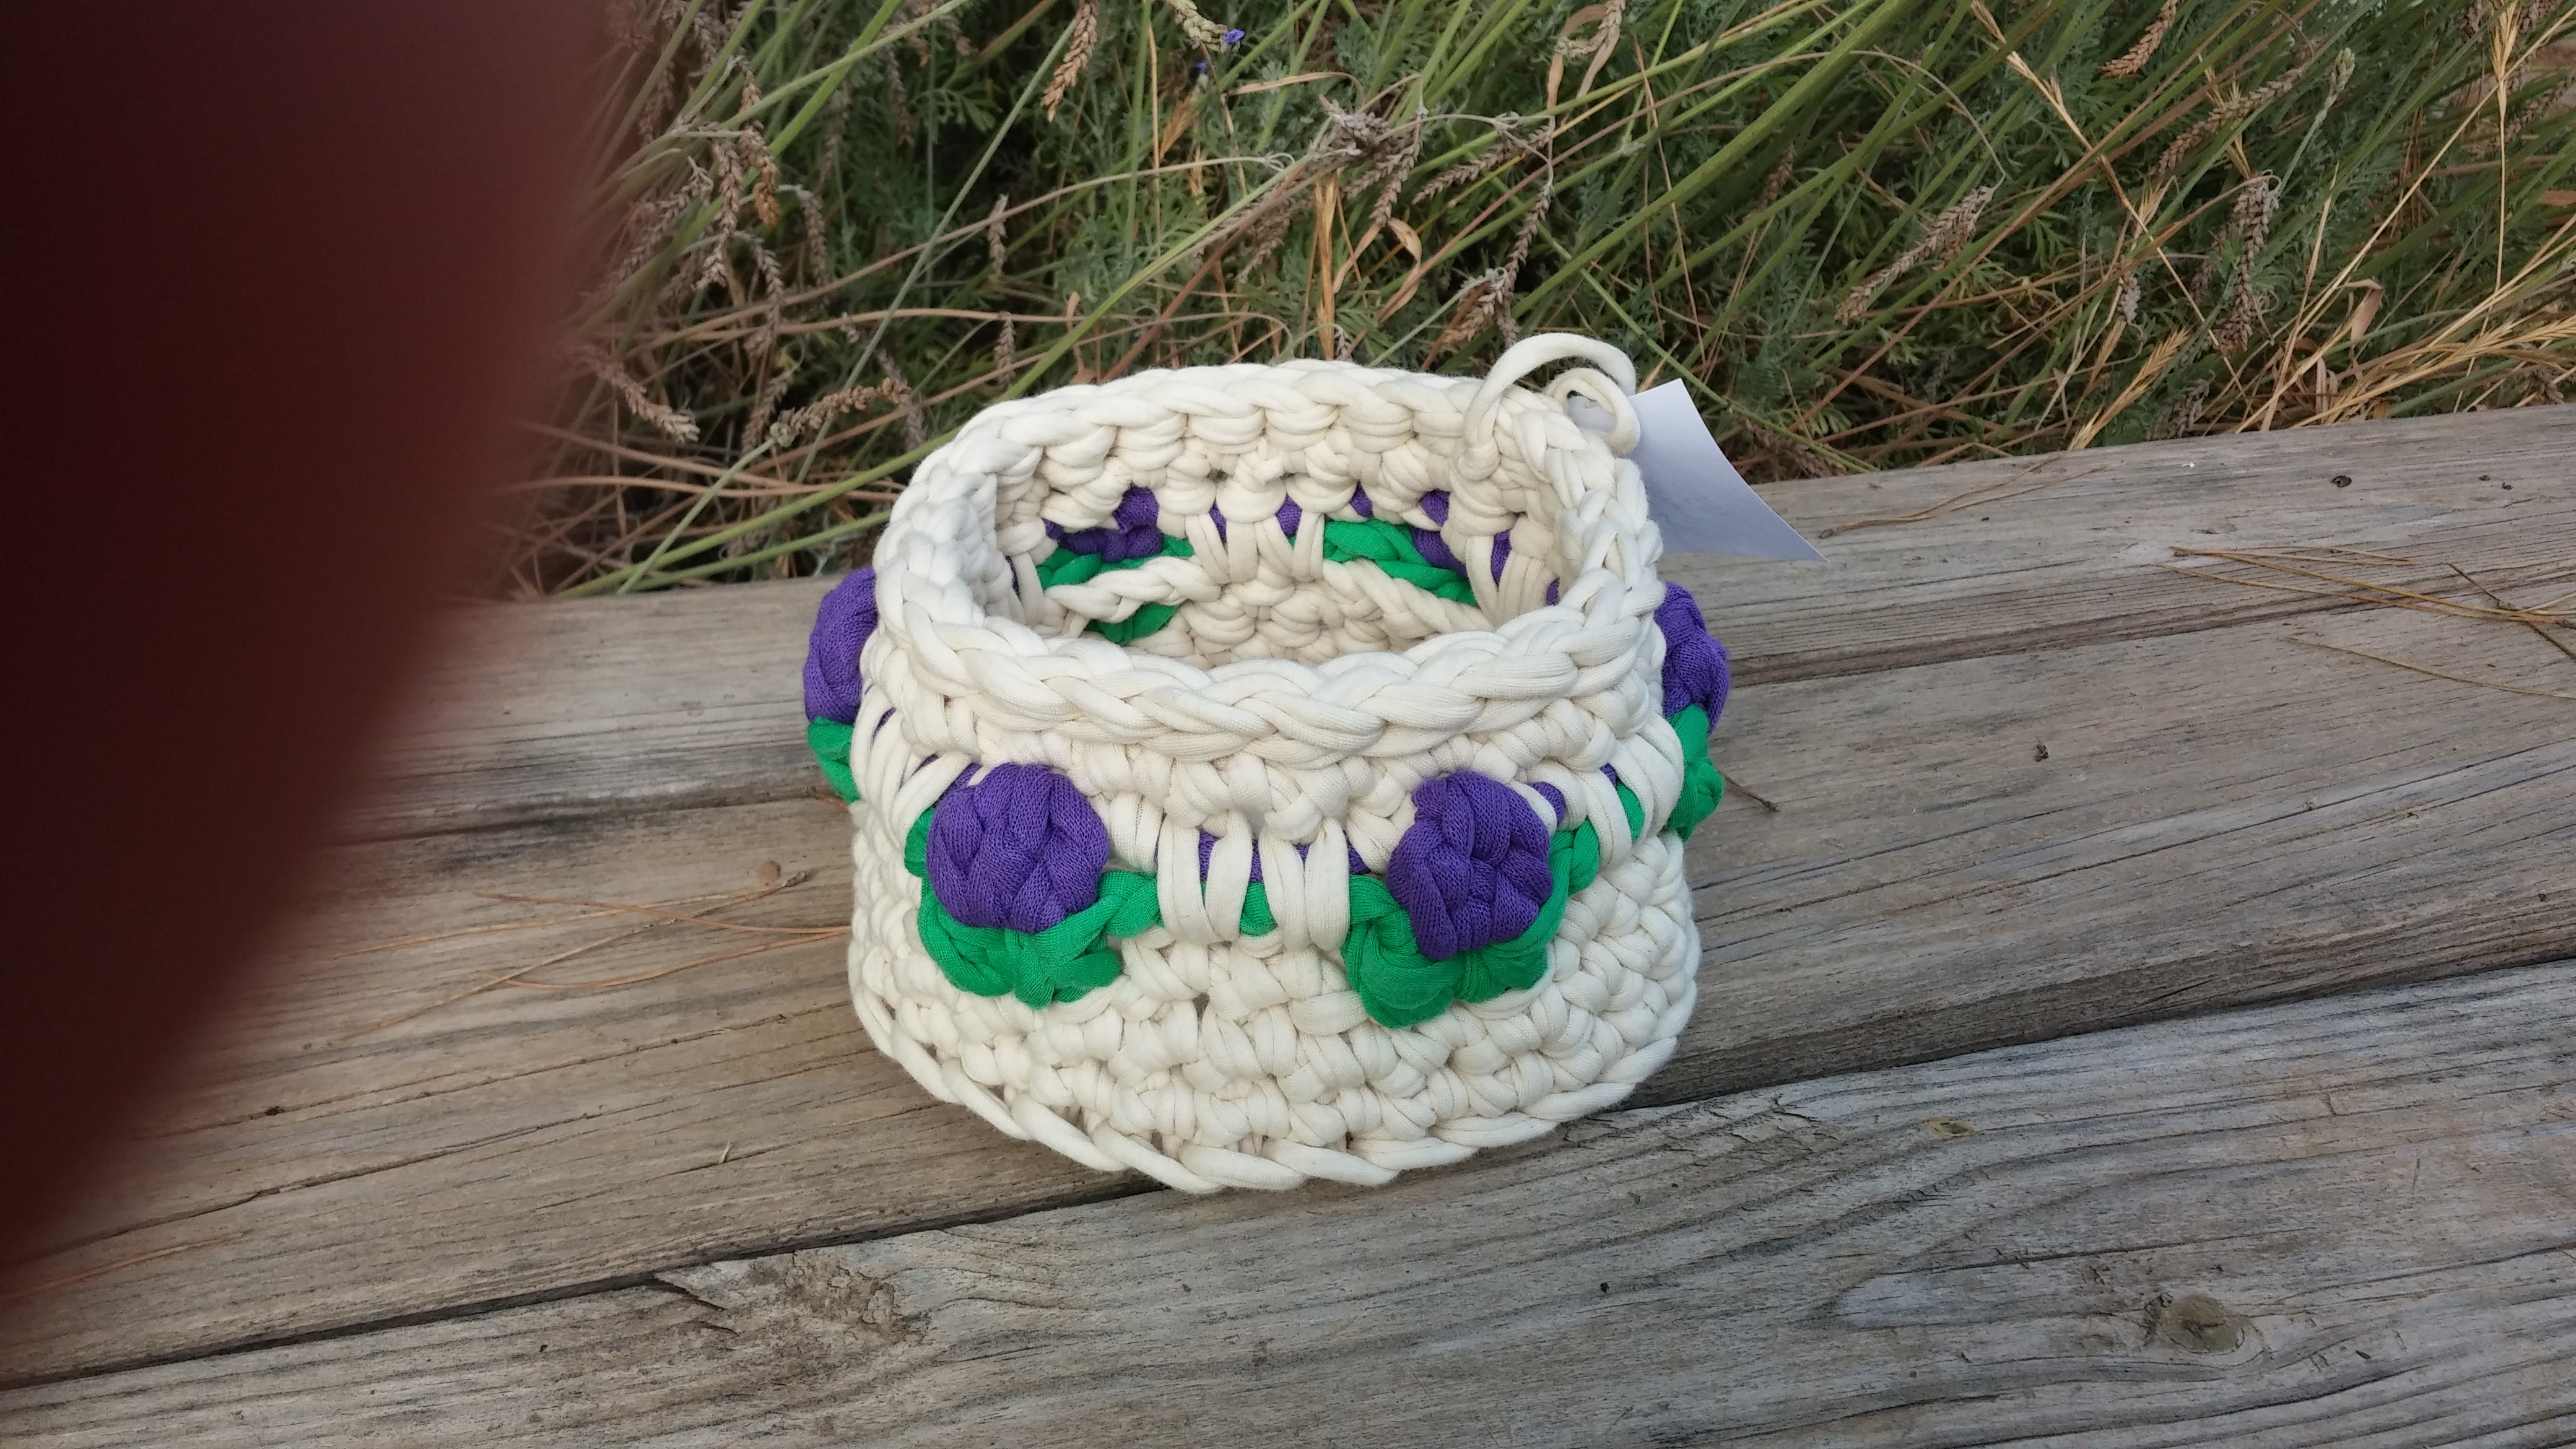
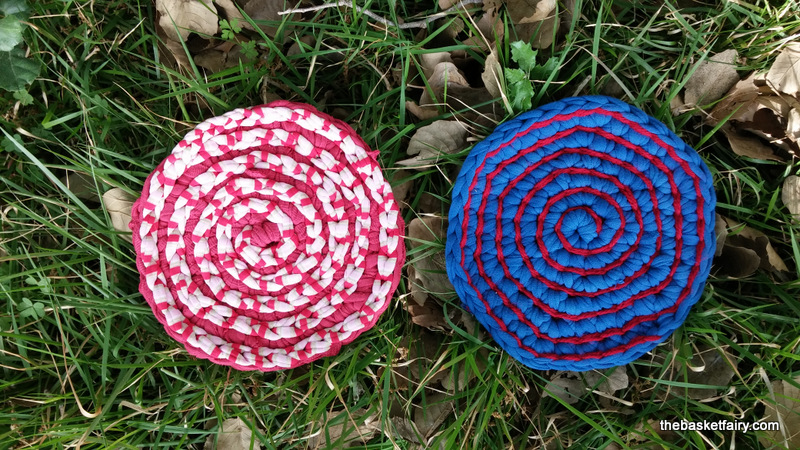
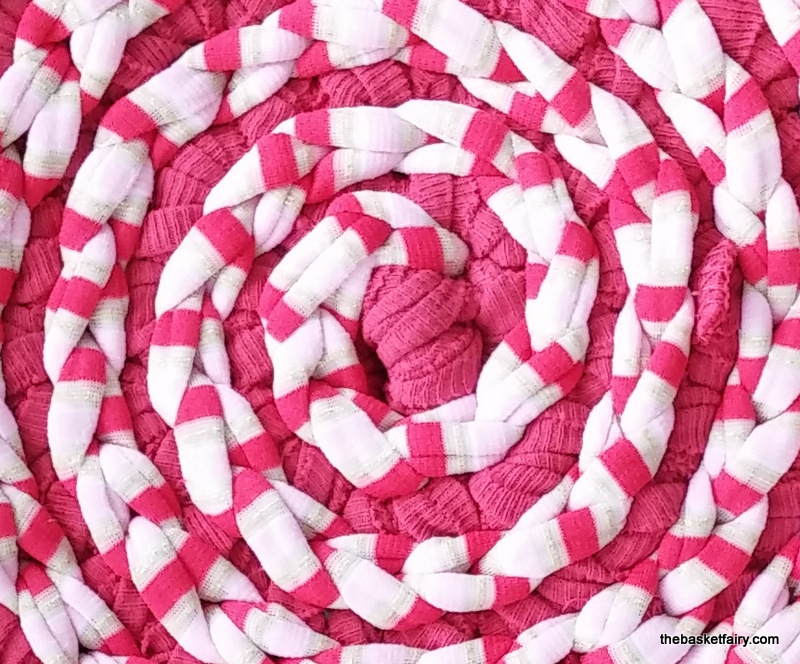
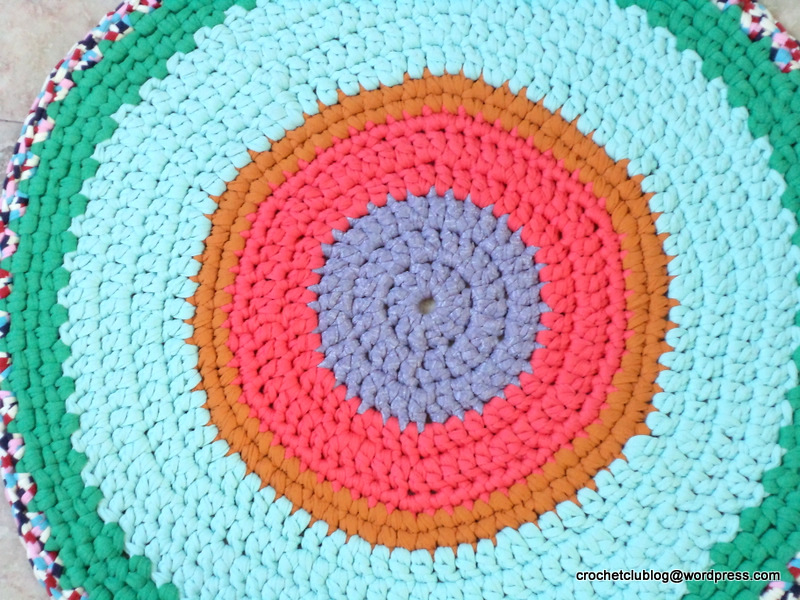
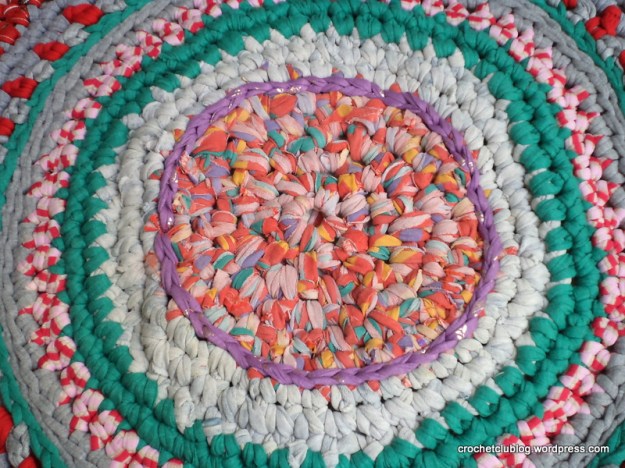
The pale pink and purple mandala was made with t-shirt yarn I cut from old shirts. I was able to use a kids’ size t-shirt for the middle, so that’s another nice thing about it – and of course it’s a great project for using up leftover strand bits, which is what I did in the hot-pink and orange mandala. I got the shirts from the ladies at the charity second-hand shop, who opened up their “for discard” shack for me… Such fine, sturdy, pretty cotton fabric salvaged! And t-shirt cotton is so perfect for protecting the table and keeping the pot-base warm.

I wrote up the pattern, below, and hope you enjoy making it. One word of advice: Give your mandalas freely to your friends and family, or you’ll end up like me, with a zillion different colored ones in your kitchen drawer!

Note: I don’t recommend using this as a pot-holder, because fabric yarn is bulky and the gaps between the stitches can make it unsafe for this purpose.

crochet t-shirt yarn mandala trivetcrochet t-shirt yarn mandala trivet

How to Make Happy Mandalas (can be used as trivets):

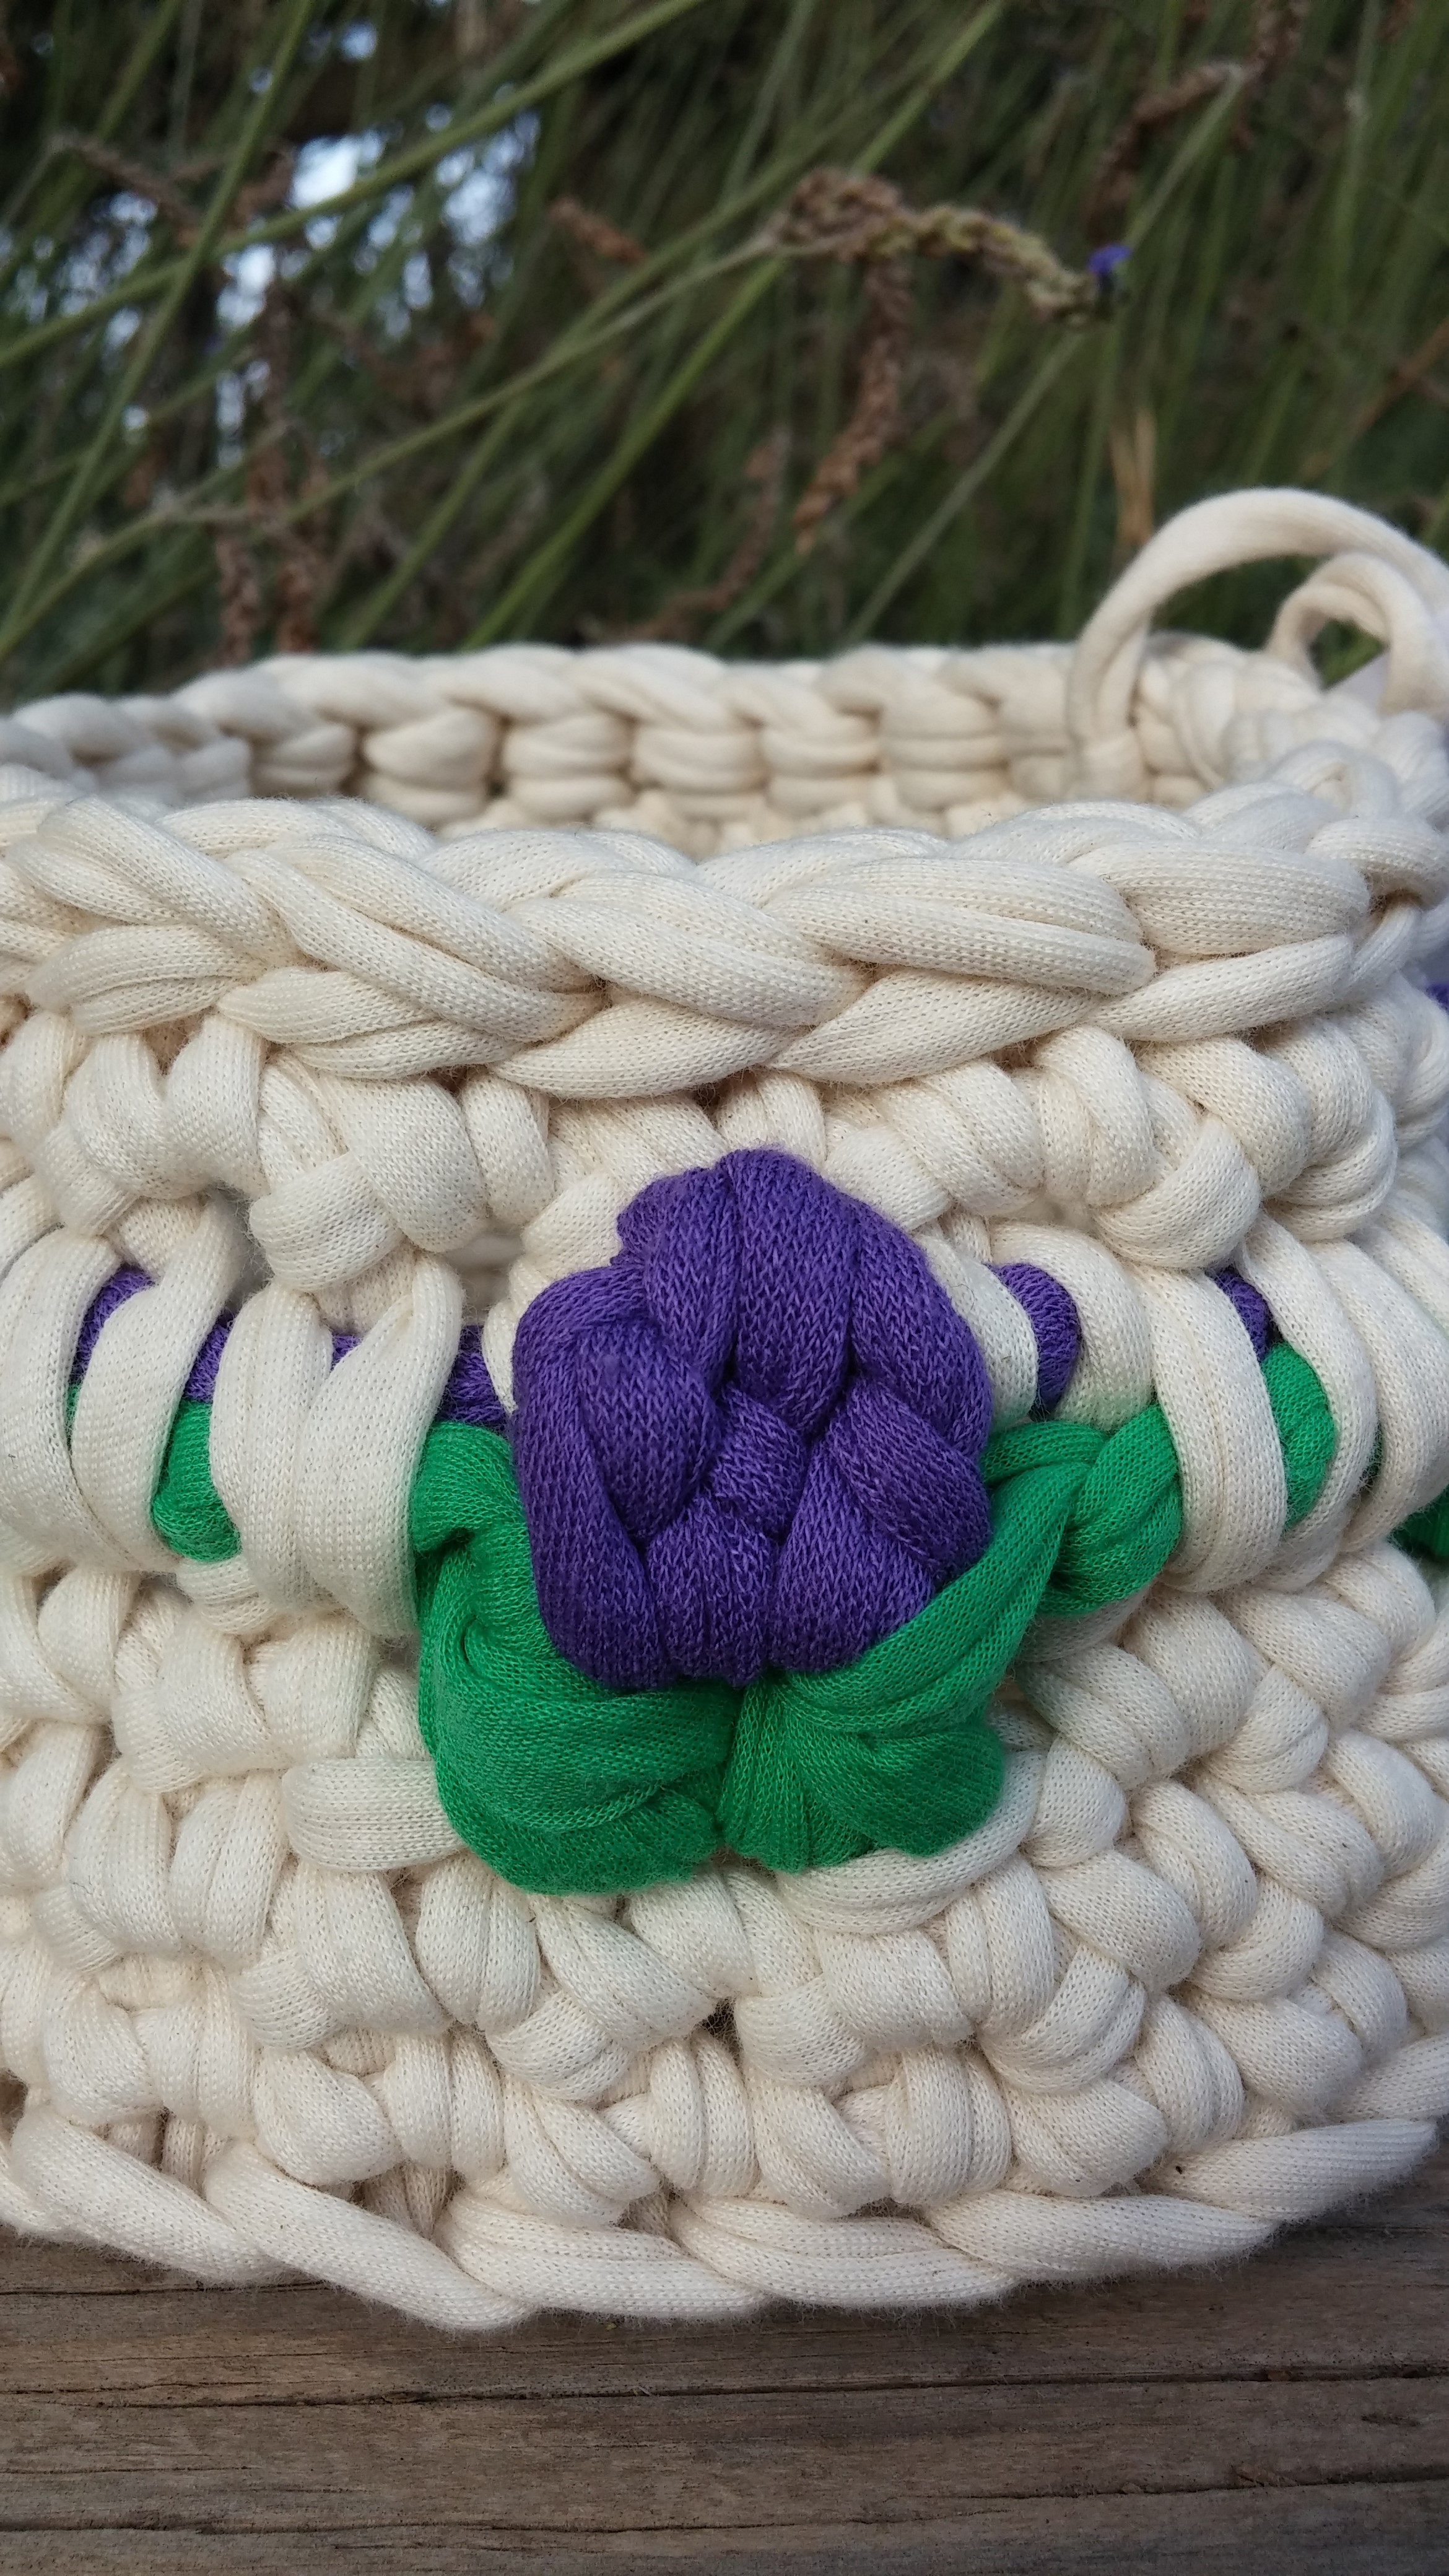
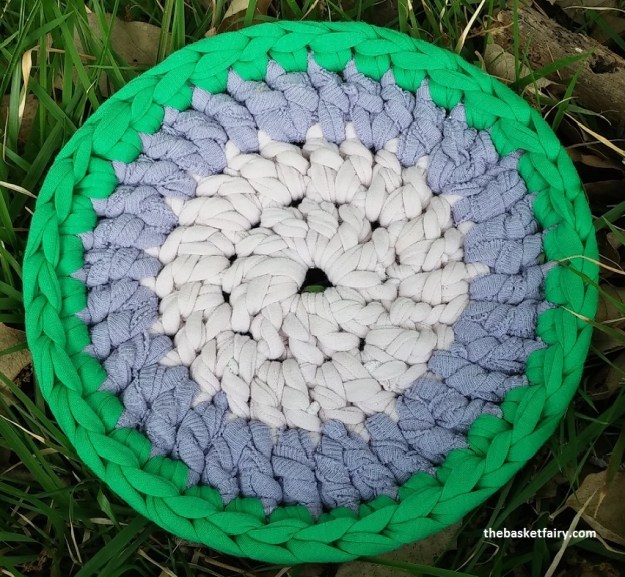
The top mandala is made from recycled t-shirts but for the green rim (I used two old children’s t-shirts).

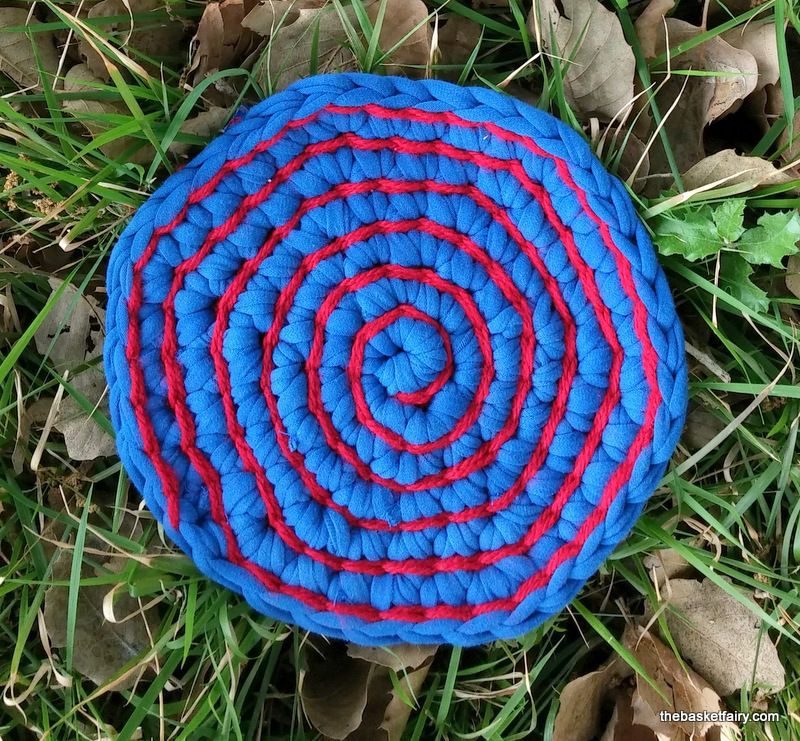
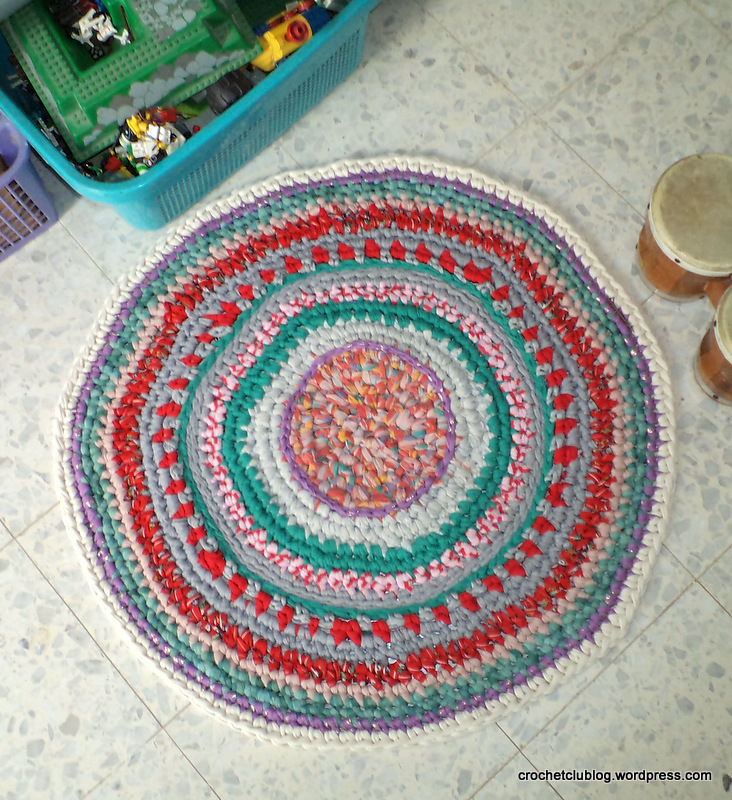
The bottom mandala is made from bought cut strands.

I used a size 12 hook, but any size works well as long as it suits your strand.

I used 3 colors for each of these (1C, 2C, 3C)

Using 1C, make a magic ring.

Row 1: Ch 3. This counts as the first dc. Make another 11 dc into magic ring. Close with sl st. (12)

Row 2: Chain 3. The ch 3 counts as the first dc. Dc into base of ch 3 (the top of the ch 3 in previous row).  2 dc in every following 11 st. Close with an invisible join, cut. (24)

Row 3: Using 2C, start with a free-standing dc into any st. 1 dc into same st. 1 dc into next st. *2 dc into next st,  1 dc into the following st*. Repeat x 11. Close with an invisible join.(36)

Row 4: Using 3C, start with a free-standing sc into any st. Sc into next 4 st, 2 sc into next st. *sc into  next 5 st, then 2 dc into next st*, rpt x 5. Close with a sl st. (42)

Row 5: Sl st into each st on previous row (surface slip stitch). Close with an invisible join and cut. (42). The surface slip stitch evens out the rim of the mandala to make it smoother and rounder looking.

Weave in the ends.

Or – and this is my very fancy secret technique, which I have titled “draw as you stitch”, but you have to be a little skilled. It  goes like this:

Row 4: Instead of adding stitches, sc into every stitch, close with an invisible join and cut strand (36). As you are working, draw the hook a bit after every stitch to make the loop longer, before beginning the next stitch.  That way, the final row will not turn bowl-like even though you haven’t added any stitches.
As you can see in the top mandala, where this technique was used, it gives you a smoother-looking and more circular edging than if you add stitches, but it requires you to draw the loops consistently to make for uniform stitches. With a little practice, it can be mastered, and is worth the effort!
For this mandala, I didn’t make a row of surface sl st (Row 5). That’s because when you use the draw-as-you-stitch technique, the last row already comes out even looking.

Save

Save

Save

Save

Save

Save

Save

Save

Save

Crochet t-shirt yarn basket

A Floral Basket

My sweet niece A.  was sweet fourteen.

I thought she might like to have a little basket To Put Things In.

I made sure I was up to date on the décor of her room  – a good thing, because it turned out there’d been recent changes in the color scheme:  Purple and green now set the tone.

I wanted the basket to be floral and… Sweet!

I remembered seeing something really cute from an artist I liked a while back…

At the time I was just starting out with fabric crochet and I remember thinking, How…???

The image, and the question, lingered in my mind.

A couple of years and a zillion baskets later, I was able to weave the inspiration into my own creation:
Crochet t-shirt yarn basket

I think (hope?) A. liked it.

I took a minute during A.’s party to take some pictures of the basket. Isn’t the spot just perfect?

Crochet t-shirt yarn basket

This would be the perfect picture if only my finger wasn’t blocking the lens…

Crochet t-shirt yarn basket

A close-up view…

Crochet t-shirt yarn basket

The perfect spot.


Save

Save

Save

Recycled t-shirt yarn trivet

From T-Shirt to Trivet

These colorful trivets were made from recycled t-shirts!
The method is simple.
But first, you need to know how to cut a t-shirt into fabric yarn. This is a good  tutorial.
One t-shirt is about enough for one trivet.

Recycled t-shirt yarn trivet

Recycled t-shirt yarn trivet

For the trim, use a different colored strand of anything (of course, left-over bits are great) – I used one strand of striped ready-made fabric yarn for the red-and-white trim, and ordinary yarn for embellishing the blue trivet with red.

Recycled t-shirt yarn trivet

Just one thing: You don’t want delicate fabrics or yarns for this. Remember, you’re going to set a hot pot base on it, so make sure it doesn’t melt away your trivet!
Fabric with a high content of cotton is good – and yarn with some cotton or natural wool content should work well. I admit I haven’t tested other types, but I’m not sure I’d want to try…

Now, here’s for my very secret, very complicated fancy pattern!

Using a no. 12 crochet hook, make a magic ring.
Row 1: Crochet 6 sc into ring.
Row 2: Working in a spiral, continue and crochet 2 sc into each st (12).
Do you know what working in a spiral means? It means you do not close off each round with a sl st, but instead, go right ahead and crochet the first 2 sc of the next round into the first st of the previous round. Do this at the end/beginning of each and every row. Place a stitch marker after the last st of every row to mark the beginning of a new row.
Row 3: *2 sc into 1st st, 1 sc into next st*, repeat 6 times. (18)
Row 4: *2 sc into 1st st, 1 sc into each of 2 following sts* repeat 6 times (24)
Row 5: *2 xc into 1st st, 1 sc into each of 3 following sts* repeat 6 times (30).
Finish off with an invisible join and weave in the ends.

Note: If you run out of t-shirt yarn in the middle of the last row, you can finish off right where you are.  Or, if you have enough for more than the number of rows in the pattern (or for that matter, less), you can just continue crocheting until the end of the strand.

If you want to insist on (almost) perfect roundness – go ahead and finish off at the end of a row. However, the spiral technique skews the circle a little anyway (if you take a close look you’ll see what I mean). So when you’ve finished, take a look and see if the shape you’ve obtained is the one you want, or continue a little if you wish until it looks just right to you, as long as the strand lasts.

Now for the trim:
Start with a sl st at the top of the second sc you made, in the space between the rows.  That will start you very near the center of the spiral. Continue with sl st in the space between the rows, one sl st for each sc in the row below it.  Draw out the sl st’s as much as you need so that your project lays flat, because the strand you use may not be identical to the one you used to crochet the base. You will be stitching in a continous spiral between the rows.

If you use a fabric yarn strand, the sl st spiral may almost cover the original crocheted spiral (as in the red-and-pink trivet)

Recycled t-shirt yarn trivet

If you use a thinner strand, such as yarn, it will accent it between the rows (as in the blue and red trivet).

Recycled t-shirt yarn trivet

When you reach the end of the spiral, draw out the strand, move it to the back, and weave in the end.

Done!


Save

denim fabric basket

The (Very) Last of the Tangerines

These were the last of them, at the top of the tree – well, at least at the top of the ladder. They were sweet, after hanging onto that tree, and sipping up every bit of sweetness and sunshine throughout the winter… They were also a deep orange, so much so that I found it hard to believe that they were ever green… We picked and ate quite a few in between, thinking each time that this was as big – and as orange – and as sweet – as they would get. Faith, patience, persistence… If we were lacking in them, the tangerines were not.

denim fabric basket
20160109_15102320160220_144156

Patience and persistence is what that old pair of jeans had, too. To wait around, faded and torn, for years – decades! Till that moment of grace  arrived and their fabric was turned into a useful and pretty denim basket.

denim fabric basket
I know it looks kind of shabby-chic (well, I’m hoping…), very raggedy and crochet-what-may-come – right?

denim fabric basket
Well, will you believe me if I tell you I crocheted, un-crocheted and re-crocheted parts of this basket as many as ten – fifteen – okay, twenty times? (Did someone mention patience and persistence?).

Crochet Denim Basket
See, it is exactly when something is “natural”, “coincidental”, that you can get to the point where – it’s not quite right, and the difference between messy – vs. cool – can be a stitch here and not there, that perfect shade of blue, and two, not three rows in height.  In the end,  I like the outcome – it just took me some time to realize This Was It.

denim fabric basket
A good thing all that time, the tangerines were busy ripening on the tree. Have some,  please – or you’ll have to wait till next year!

denim fabric basket


The Prince and the Not-Exactly-Pauper

Remember Louis , the neighbors’ cat for whom I made a cozy basket? All summer, Louis spent most of his time outside, and so I waited with great anticipation a certain interest to see whether the basket would do its job of keeping Louis warm and snug.
Then one day, when the weather was starting to get a little chilly, I received this on-site photo from Louis’s people:

IMG-20160123-WA0002 yoramI was flipping overjoyed delighted! Louis is actually using his basket, and he looks as pleased and snug as… Well, a cat in a basket! And take a look at this one – one can only imagine what sweet dreams he must be having (about the summer, when he was chasing toads?).

IMG-20160123-WA0000 yoramLouis’s new basket is perched on the exact same newspaper basket that he was using to snooze in before he received my gift. Rather than give it up, and finally allow his people access to their newspapers, Louis apparently decided that two baskets are better than one. Like many a cat, he has a certain regal inclination to assume he will meet little resistance on such matters from his people, which of course proved true in this case.

20160123_190602 hila

Which brings me to another Louis, one much closer to kings and thrones and such, but let me tell you the story as it actually happened or you will not believe me!
Soon after posting about the basket I made for Louis, I was googling the title – but typing in “A Basket for Louis” brought me to another Louis, in another basket, in another place – and not just any old place – but the splendid and ancient Wells Cathedral in England! I quickly read on to see who this famous feline was – and lo and behold, it turns out the Wells Cathedral Lewis is a ginger tom-cat just like our next-door Louis!

Louis the Wells Cathedral Cat

Photo Courtesy of Marilyn Peddle

I was speechless… Our neighbors’ cat has a world-famous doppelganger! So famous, he’s even had a little film made about him… Louis of the Cathedral is so eerily like next-door Louis – in his appearance, in his tom-ish nature, and in his love of snuggling in cozy baskets. Like our next-door Louis, Cathedral Louis reigns from his basket over the abode that he resides in, certain that he is the true regal ruler of the premises.

The Wells Cathedral, Photo Courtesy of Peter Broster

The Wells Cathedral, Photo Courtesy of Peter Broster

I read the stories about Louis the Cathedral cat with fascination, looking for a possible explanation to this uncanny coincidence. Twins separated at birth? Some cat-magician casting a spell? You may think there is a logical explanation, such as – our neighbors having heard of the Cathedral Louis when they named their cat – but I assure you that this is not the case! You see, Louis was a lost kitten when our neighbors took him in. The name Louis was chosen by a little girl who didn’t speak a word of English at the time, in a country very far from England and its cathedrals. I have no idea where she’d even heard the name, but it must have sounded exotic to her.

And so the mystery remains. Perhaps ginger tom cats with regal inclinations and a love of cozy baskets simply inspire the name Louis in their people? For while the Cathedral Louis is very princely, you can see by now that our neighbors’ Louis is far from a pauper. He spends his winter days snuggling and snoozing in what is definitely the best spot in the house, close enough to the wood stove, with a good view of the front door, in full control of everything and everyone. In summer, he reigns over the great outdoors, coming and going as he pleases.

As cats are not big travelers, I doubt these two will ever meet. It is also quite unlikely, given the geographical distance between them, that they were ever exchanged. But I hope they both continue to enjoy their different – and yet somewhat similar – lives, snug, happy and purring with royal content.

IMG-20160124-WA0000 yoram

Crochet basket with recycled fabric trim

Autumn Bounty

Walking home from the bus stop I passed by the clothing recycling bin. Next to the bin was a plastic bag with some children’s clothes, and on the top was a boys’ dress shirt in turquoise with purple-pink stripes. How could anyone think of turning that into clothing pulp, or – as rumor has it – cloth wipes for the car wash industry? Mercy knows no boundaries, and so I picked up the shirt and took it upon myself to deliver it to the second hand shop, whose earnings all go to scholarships for disadvantaged girls. Which is how it landed upon my good deed roster to also launder it. It was only when I took the clean shirt down from the clothing line that I noticed it: An amoeba shaped fade-stain on the front right next to the second button from the bottom. By now, however, there was no turning back: Our destinies were intertwined, and knew I had to do what I had to do – tear the shirt up into strips and crochet it.

Crochet basket with recycled fabric trim Crochet basket with recycled fabric trim
Whether bounty or burden, I could not deny the delight of hooking this delicious color as a trim for a small basket.
I used an equally delicious pale magenta strand to make a soft but sturdy basket that I have not yet decided how to use. In the meantime, it is posing here with some hand-picked tangerines, a gift from our dinner guests, or rather, from their tree. Is there anything fresher or sweeter?

crochet fabric yarn basket

The architecture:

Crochet basket with recycled fabric trim

Crochet basket with recycled fabric trim

And a close-up view of the recycled trim. The frayed edges give it personality, but also actually keep it from unraveling better than cut edges:

Crochet basket with recycled fabric trim

Crochet fabric yarn rug textile yarn

My Sunshine Rug

It took quite a few baskets and a several highly experimental rug attempts until I was able to muster up the courage for a simple proposal to a very special someone:
“Umm… Of course if you’d like a rug…”
How delighted I was to receive that simple leap of faith:
“Sure, why not?”
A quick trip to the fabric yarn shop, and back I was with two bags of everything bright and pretty.
The choices were made by the recipient of the rug (the colors and their placement  – I’m not sure I would have been as bold!), whereupon stitching was begun… And not stopped until I had this!
It reminds me of a bright sun in a circular sky, and so the title, but I admit it also has to do with the recipient.
Crochet fabric yarn rug textile yarn

Crochet fabric yarn rug textile yarn

Crochet fabric yarn rug textile yarn


How I Made the Rug:
I used a size 12 crochet hook and medium-width, medium-stretchy fabric yarn.
I started with a magic ring, stitching 12 dc into it, and ending the row with a sl st into the first dc.
To start a new row, ch 3 (or ch 1 if you’re starting a row of sc).
To start a new strand/color in a new row, sl st into previous row, and chain the number of stitches needed (ch 3 for a row of dc or ch 1 for a row of sc).
I used dc or sc alternately, depending on the texture of the strand – for softer or thinner strands, I used dc. For less flexible or thicker strands, I used sc. Another consideration was the color pattern – for example, rows 4-5, the orange, were done in dc, but for row 6, I used sc, because another row of dc would have made the orange circle too large for the composition.
How did I know this? Because I tried it, of course!
This is my favorite designing method – make, undo, remake until you’re happy with the result.
Of course, a row of sc takes up less thread too, so when you’re nearing the end of the strand, this may be a consideration (not so in this particular case).
The increases are made as usual – 12 increases for rows of dc, 6 increases for rows of sc.
When I reached the green strip, I switched to woven stitch (here is my explanation on woven stitch).
But you can continue on with sc.
The main reason I used woven stitch here is because my green strand was thicker than the blue of the previous row, and I thought the woven stitch would be less bulky.
Accommodating stitches to the strand type is one way to integrate different types and widths of strands in the same project.
But whatever stitch you are using, it’s important to remember that if you have a thicker strand, you may need less increases in the first row of that strand, and if you have a thinner strand, you may need more increases in the first row of that strand.
So there is always the formula for increases, but you have to look at the outcome and see if your rug is lying nice and flat.
Generally: Flat is good, wavy means you have too many increases, and bowl-shaped means you don’t have enough increases.
The final crazy-colored row was done in 2 sc into each space of the previous row (space = below ch st).
Increases for this row, when needed, were done with 1 ch st between 2 pairs of sc.

Fabric Crochet Basket Textile yarn t-shirt yarn plarn trapillo

It’s Not Me, It’s the Basket Fairy!

Yes, I know I’ve already made lots of baskets, even one or two pretty much like this one, but can I help it if I go out to the garden and find a cute pink basket just sitting in the geraniums waiting to be picked up? And can I help it if it’s just the right size for the baby gift I wanted to give my friends, and it even complements it in color? And can I help it if the baby who got it just loved it?
It’s the Basket Fairy, hovering over, finding the right moment to leave a soft, squeezable, colorful little gift where I least expect it. What would you do?

Fabric Crochet Basket Fabric Crochet BasketFabric Crochet Basket

How I Made the Basket: The same way as always… A size 12 hook and medium-wide, slightly stretchy, but not too stretchy, fabric yarn. Start with a magic circle and crochet a spiral base (or just a round base) in yarn under single crochet. Finish off with an invisible join. Start row 1 anywhere, crocheting into back loops only in YUSC. At the end of row 1, slip stitch into first stitch, chain 1, and continue stitching the next rows the same way. When you have reached the desired height, finish off with an invisible join. To make the trim, I used a complementary strand of fabric yarn. Place the basket facing you so that the part where you made the slip stitches to finish off the rows is in the far back. Now insert the hook into the back loop of the stitch in the middle of the top row (facing you ) to make a slip stitch, leaving a generous tail for the bow later on. Slip stitch into every stitch thereafter, into back loop only, till you have reached the stitch before the one you drew the strand from. Finish off with an invisible join. Cut the strand, leaving a tail the same length as the first one. You now have 2 tails on the inside of the basket. Draw each of the tails to the outside of the basket, using the spaces between double crochet stitches of the last row of the basket, with one dc stitch between them, and tie them in a bow.

crochet fabric yarn rug

Candy Carpet and Blogiversary

It seems appropriate at the close of a year to come full circle to one of my first fab-yarn (my term for fabric yarn) projects. Fortunately I took the pictures some time ago, because by now it has already undergone some wear! But before I tell you about it, I want to go back to August, 2014, when I first started writing here…
I was crocheting incessantly at the time because it was all I could do in face of a raging war where I live. I was hanging on to the threads of fabric yarn for balance, and they became threads of hope and prayer to me. Not much in the way of combating evil but on a personal level, it was panacea.
That round of hostility is over, but it seems as if the ongoing conflict has splintered into anger and cruelty and hatred. Summer, with its crazy heat and humidity, has apparently instigated flames in sad and frightening ways.
I have learned that stitching gives me some inner peace in times of turmoil, whether regional or very personal. I thank you for joining me in this peaceful abode, and welcome your company in the Pursuit of Simple Joys.

Crochet rag rug

So this is the rug, titled Candy Carpet for the candy-cane striped strand midway, and the general crazy color scheme. It was a by-product of my First Project, because the same day I raided my closet for old t-shirts and tights, I realized that not all old clothes necessarily go well with each other. The pink-red-purple-turquoise pattern of the old tights in the middle simply did not blend well with the brown-green checks of the old flannel shirt.

Crochet Rag Rug
And so my first rug became two rugs – I started them both alongside, then went to the fab-yarn shop and bought what I needed to match each of them. Having started with crazy colors I went along, and this was also a chance to feature one of my favorite ever strands – see the red floral cotton between the pink and the gray? This home cut strand, originally a curtain hem, was a gift from my MIL who was glad to donate her stash in support of my newfound creative endeavor.  I think we’re giving “vintage” a new meaning here.

Crochet rag rug
Like my first first-rug, this project was done in happy obliviousness of rules and conventions. All I knew was “intuitive” crocheting, as in, adding enough stitches to make it settle nice and flat. I think it worked for the most part, and when it didn’t, I un-crocheted it, and tried and erred till I was happy with the result. The same with the colors and pattern – I stitched around, then unraveled it if I didn’t like it… So in all, if I had crocheted forward and not back-and-forth, this rug could probably cover our living room floor. But as it is, it’s just right for a visiting toddler to settle on – and enjoy the legos that have been sitting around since my kids were resident toddlers.

Crochet Rag Rug
You may notice the center is a bit off-center. Like my other first carpet, I kept to the rule of – not a scrap of old scraps is to be thrown away, so I stitched until the strand ended, which was not always at the end of a row. But since the fabric pattern was so wild anyway, I just let it be, and put a little peace and order in by encircling the middle enclave in purple and gold. Some additional containment I think was obtained with the off-white border. I also think it gives it kind of an ethnic-carpet style, don’t you?
I can tell you it’s soft and comfortable to sit on, and that is the one nice thing about making rugs out of well-worn, thread-thin 20 year old cotton tights…