Tag Archives: woven stitch

The Prince and the Not-Exactly-Pauper

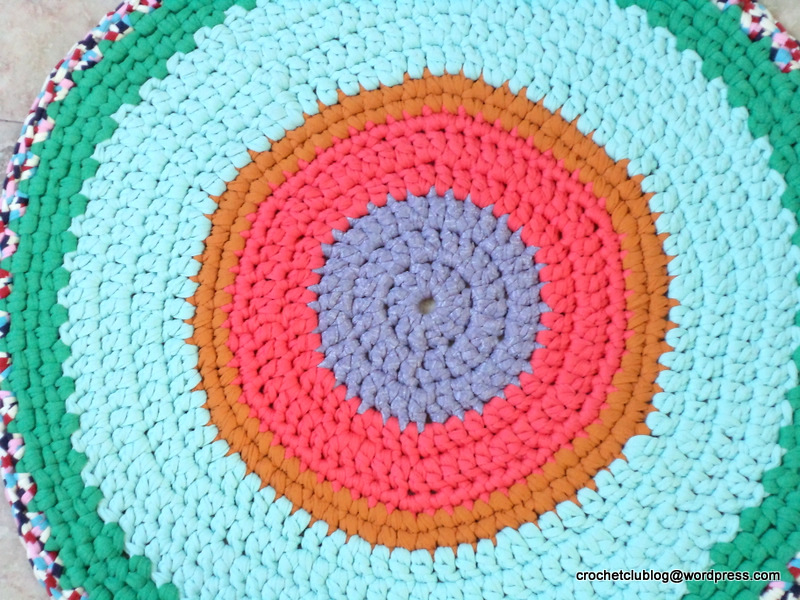
Remember Louis , the neighbors’ cat for whom I made a cozy basket? All summer, Louis spent most of his time outside, and so I waited with great anticipation a certain interest to see whether the basket would do its job of keeping Louis warm and snug.
Then one day, when the weather was starting to get a little chilly, I received this on-site photo from Louis’s people:

IMG-20160123-WA0002 yoramI was flipping overjoyed delighted! Louis is actually using his basket, and he looks as pleased and snug as… Well, a cat in a basket! And take a look at this one – one can only imagine what sweet dreams he must be having (about the summer, when he was chasing toads?).

IMG-20160123-WA0000 yoramLouis’s new basket is perched on the exact same newspaper basket that he was using to snooze in before he received my gift. Rather than give it up, and finally allow his people access to their newspapers, Louis apparently decided that two baskets are better than one. Like many a cat, he has a certain regal inclination to assume he will meet little resistance on such matters from his people, which of course proved true in this case.

20160123_190602 hila

Which brings me to another Louis, one much closer to kings and thrones and such, but let me tell you the story as it actually happened or you will not believe me!
Soon after posting about the basket I made for Louis, I was googling the title – but typing in “A Basket for Louis” brought me to another Louis, in another basket, in another place – and not just any old place – but the splendid and ancient Wells Cathedral in England! I quickly read on to see who this famous feline was – and lo and behold, it turns out the Wells Cathedral Lewis is a ginger tom-cat just like our next-door Louis!

Louis the Wells Cathedral Cat

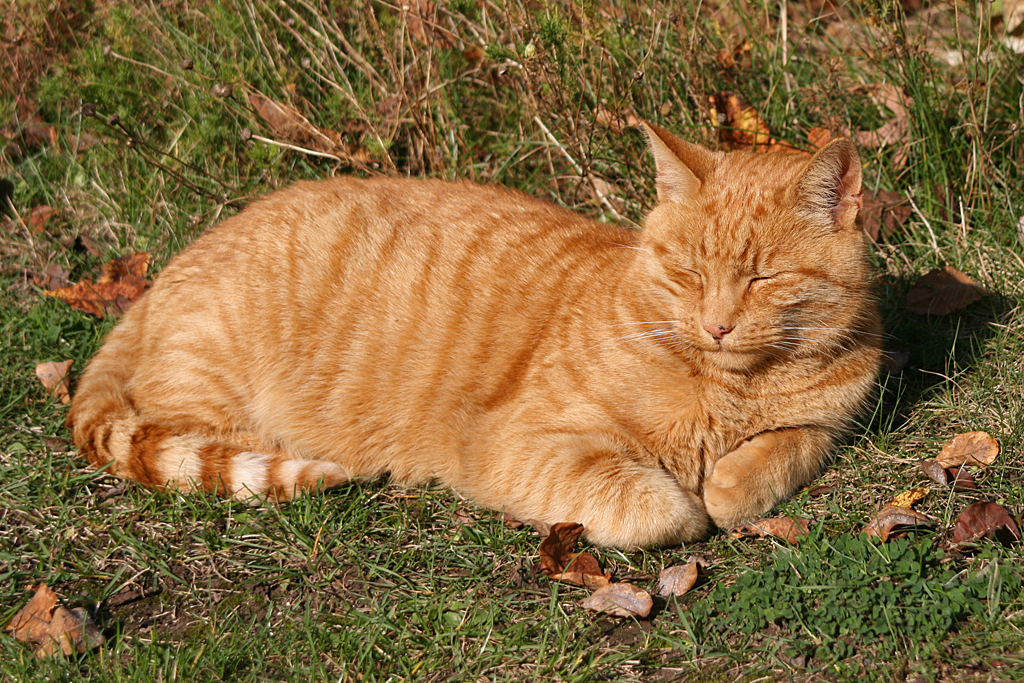
Photo Courtesy of Marilyn Peddle

I was speechless… Our neighbors’ cat has a world-famous doppelganger! So famous, he’s even had a little film made about him… Louis of the Cathedral is so eerily like next-door Louis – in his appearance, in his tom-ish nature, and in his love of snuggling in cozy baskets. Like our next-door Louis, Cathedral Louis reigns from his basket over the abode that he resides in, certain that he is the true regal ruler of the premises.

The Wells Cathedral, Photo Courtesy of Peter Broster

The Wells Cathedral, Photo Courtesy of Peter Broster

I read the stories about Louis the Cathedral cat with fascination, looking for a possible explanation to this uncanny coincidence. Twins separated at birth? Some cat-magician casting a spell? You may think there is a logical explanation, such as – our neighbors having heard of the Cathedral Louis when they named their cat – but I assure you that this is not the case! You see, Louis was a lost kitten when our neighbors took him in. The name Louis was chosen by a little girl who didn’t speak a word of English at the time, in a country very far from England and its cathedrals. I have no idea where she’d even heard the name, but it must have sounded exotic to her.

And so the mystery remains. Perhaps ginger tom cats with regal inclinations and a love of cozy baskets simply inspire the name Louis in their people? For while the Cathedral Louis is very princely, you can see by now that our neighbors’ Louis is far from a pauper. He spends his winter days snuggling and snoozing in what is definitely the best spot in the house, close enough to the wood stove, with a good view of the front door, in full control of everything and everyone. In summer, he reigns over the great outdoors, coming and going as he pleases.

As cats are not big travelers, I doubt these two will ever meet. It is also quite unlikely, given the geographical distance between them, that they were ever exchanged. But I hope they both continue to enjoy their different – and yet somewhat similar – lives, snug, happy and purring with royal content.

IMG-20160124-WA0000 yoram

Advertisement
Crochet fabric yarn rug textile yarn

My Sunshine Rug

It took quite a few baskets and a several highly experimental rug attempts until I was able to muster up the courage for a simple proposal to a very special someone:
“Umm… Of course if you’d like a rug…”
How delighted I was to receive that simple leap of faith:
“Sure, why not?”
A quick trip to the fabric yarn shop, and back I was with two bags of everything bright and pretty.
The choices were made by the recipient of the rug (the colors and their placement  – I’m not sure I would have been as bold!), whereupon stitching was begun… And not stopped until I had this!
It reminds me of a bright sun in a circular sky, and so the title, but I admit it also has to do with the recipient.
Crochet fabric yarn rug textile yarn

Crochet fabric yarn rug textile yarn

Crochet fabric yarn rug textile yarn


How I Made the Rug:
I used a size 12 crochet hook and medium-width, medium-stretchy fabric yarn.
I started with a magic ring, stitching 12 dc into it, and ending the row with a sl st into the first dc.
To start a new row, ch 3 (or ch 1 if you’re starting a row of sc).
To start a new strand/color in a new row, sl st into previous row, and chain the number of stitches needed (ch 3 for a row of dc or ch 1 for a row of sc).
I used dc or sc alternately, depending on the texture of the strand – for softer or thinner strands, I used dc. For less flexible or thicker strands, I used sc. Another consideration was the color pattern – for example, rows 4-5, the orange, were done in dc, but for row 6, I used sc, because another row of dc would have made the orange circle too large for the composition.
How did I know this? Because I tried it, of course!
This is my favorite designing method – make, undo, remake until you’re happy with the result.
Of course, a row of sc takes up less thread too, so when you’re nearing the end of the strand, this may be a consideration (not so in this particular case).
The increases are made as usual – 12 increases for rows of dc, 6 increases for rows of sc.
When I reached the green strip, I switched to woven stitch (here is my explanation on woven stitch).
But you can continue on with sc.
The main reason I used woven stitch here is because my green strand was thicker than the blue of the previous row, and I thought the woven stitch would be less bulky.
Accommodating stitches to the strand type is one way to integrate different types and widths of strands in the same project.
But whatever stitch you are using, it’s important to remember that if you have a thicker strand, you may need less increases in the first row of that strand, and if you have a thinner strand, you may need more increases in the first row of that strand.
So there is always the formula for increases, but you have to look at the outcome and see if your rug is lying nice and flat.
Generally: Flat is good, wavy means you have too many increases, and bowl-shaped means you don’t have enough increases.
The final crazy-colored row was done in 2 sc into each space of the previous row (space = below ch st).
Increases for this row, when needed, were done with 1 ch st between 2 pairs of sc.

Crochet Fabric Yarn Basket for Cat Textile yarn basket t-shirt yarn plarn trapillo

A Basket for Louis

Louis needed a basket to snuggle in. His people mentioned something about it rather inadvertently (I thought I heard the word “cat”, or maybe it was “bat”? And there was something about “basket”, but it might have been “brisket”, I’m not sure). At any rate, when I offered to make Louis a basket of his very own, they didn’t object. Well, not very insistently. I knew of course they were only being polite so as not to trouble me and so I assured them I’d be delighted to make it.
I asked them what color they wanted it to be (I am so very careful not to impose my designs on my friends’ décor). They said maybe dark red. Fortunately I had some, and I thought it would go well with the gray.
Louis’s people liked the basket, and I hope Louis will too (Right now it’s high summer so Louis spends most of his time outside, stalking frogs and such). If you want to know how I made the basket, please scroll down.
The cat in the pictures is not Louis, but our cat, who always joins me whenever I’m taking pictures of my projects in the garden. In this case she seemed especially interested, and in the end I could see why. I had to re-tie the bow a few times but now it’s back to it’s original elegant form.
(For updates on Louis and his basket, and a rather regal surprise, see The Prince and the Not-Exactly-Pauper.)
Louis 5bLouis 8Louis 9Louis 3

How I made the basket: I asked Louis’s people what size they thought it should be. They measured the newspaper basket he usually settles in and said, 30cm X 40cm. Since I wanted to make an oval, I subtracted the width from the length (40 – 30 = 10) and that gives you the length of the starting chain.

Make a starting chain of 10cm (I used a size 12 hook), ch 1, then sc into the 2nd st next to the one on on your hook, and into every one after but the last.

When you reach the end stitch, make 3 sc into it. Continue with sc into each st on the other side. When you reach the end stitch, sc 2 into it, which will join the one sc you made at the start.

Continue with sc in a spiral, always adding 3 sc on the round part of each side every time you crochet along it, the same way you pick up your salary whenever you pass ‘start’ in Monopoly.

When your width is 30 cm, your length should be 40 cm.  Stop adding, and make a row of 1 sc all around. Finish it off with an invisible join and cut.  Start a new thread for the next row (mine was red), crocheting with woven stitch around the base (crochet from the outside, with the right side of the base facing upwards), and close the row with 1 sl st and 1 ch st. Continue upwards with woven stitch, closing each row with sl st and 1 ch st. Notice you are no longer crocheting in the spiral but closing with a sl st  and ch 1’ing at the end of each row.

When you reach the desired height, finish off the last row with an invisible join and cut.

Make the trim using sl st into back loops only of top row of sides, finishing off with an invisible join. Leave a tail at the beginning and end of the trim (mine was gray as you can see).

Draw the tails outside, and cut a separate piece of red strand.  Try and simulate tying a bow before it’s cut so you know how long to cut it. Now place the cut strand on the inside of the basket where the gray tails were, draw out the tails of the red strand, and tie a pretty bow on the outside.  Snip the ends to match the length of the gray tails. I tied a single knot at the ends of the gray tails because it made them hang down a little better, so if you want to do that, tie first before matching the length of the red.

black fabric yarn handbag

Little Black Bag

The place where I buy fabric yarn had black on sale. I’m not big on black for home décor, but it occurred to me that I do need a new handbag. Badly.2014-2-canon 245After some crocheting and un-crocheting I figured out the problem with fabric-yarn bags: They can be very weighty. I realized the bag I was trying to make would outweigh my present sack before I ever put anything in it. I decided to try the unlikely approach: Instead of going for dainty and delicate as I had done, which resulted in a tightly-textured, sturdy but very heavy tote, I would go for loose and large – more air, less weight. Out came my no.15 rag-rug hook.

2014-2-canon 243I made a small oval base starting with 9 stitches using the chainless foundation method (link below if you’re not familiar with it).  For the second row of the base, I used single crochet worked into the back loop (I’m using American crochet terms here).  I increased as necessary at the ends to create the half-rounds of the oval (for more details on the oval base, roll on down).  From then on I just went straight up with the woven stitch (no more increases at ends of rows). The woven stitch is a really cool stitch because it is so simple and yet the texture really looks like checked or woven fabric.2014-2-canon 231It’s made by working 1 single crochet, then one chain, and skipping a stitch in the previous row, and so on; In the next row, you alternate and work the single crochet into the gap where you skipped in the previous row, then chain one and skip. Besides the cool checked effect, you get texture that is strong but not dense, and while there are skips and gaps, what you see – and get – is pretty solid, no visible holes, no functional gaps for things to fall through. So with the big hook, and all that air worked in – you get a bag that is light and yet tight.

Crochet diy fabric yarn bag

Little Black Bag

The body of the bag was worked in a spiral. Of course you don’t really see a spiral; When you finish the oval base, you just continue working into the last row of of the base with the woven stitch. When you finish the first row of the woven stitch you don’t slip stitch and chain two etc., instead you continue working into the first stitch of the first row and on from there. No stop signs, no traffic lights, just crochet on and on until you reach the desired height. I made 15 rows for the body of the bag. Just one thing: Finish the last round at the side edge of the bag so you don’t see a jump in height, and use an invisible join after the last sc you make. This will happen after you attach the rings.

2014-2-canon 235The rings: While working the last row, I attached the rings (wooden curtain-rod rings). Here’s how: After completing the first sc stitch from the side of the bag, you push the hook into the ring and draw the yarn from where it was, and complete a chain stitch with the ring inside it. Skip one stitch on the row below and insert the hook for the next sc as you normally would, keeping it tight to help fasten the ring securely. Complete the single crochet: Ring attached. As you near the end of the row, attach the second ring in the same way starting one before the last stitch, so it is the same distance from the edge. Do the same on the back side of the bag, for 4 rings in all, making sure they are aligned and in equal distance from the edges.

2014-2-canon 240So, where did I get that cord? I had a stash of goodies given to me by a loving family member. In our family, stashing Useful Things That Can Be Made Into Something crosses generations, and sometimes, so do the stashes themselves. I think it must have been a belt for a dress somewhere in the seventies. It’s strong enough to carry the weight of the bag, but soft enough to distribute it comfortably.  I should say, the bag is not very big and not intended for carrying very heavy things. I tested it with a water bottle, a phone and sunglasses and it worked.

2014-2-canon 249So it’s probably more of an evening bag by me, and replacing my potato-sack day bag will have to wait till I find/make something bigger
Notice the bag is worked in a continuum, which is what the spiral does, so there is no stitching, no matching, no stopping and going, one piece to crochet, and one piece visually – a small item that has one basic pattern (besides the base) which makes it neat and smart, creating a kind of contrast with the true nature of fabric yarn, which is soft, rustic and uneven. That true nature is still there but kind of in hiding, which is what makes it cool.
It’s almost autumn so I took some pictures with a mug of tea and a couple outside under the oak tree with some romantic and very authentic autumn leaves.  The pretty mug was made by Ayelet.
2014-2-canon 2512014-2-canon 2372014-2-canon 236

How I made the oval base:  So, the inside of the oval base is the foundation row which already has sc (single crochet) worked into the chain, and you work sc on the other side as well. I made the necessary increases to create the half-rounds at both ends of the foundation chain.  How to increase at the ends of the base to create the oval: When you’ve completed the 9 stitches of the chainless foundation as below, *sc again into the last chain, chain 1, sc crochet again*, then start working the other side of the foundation chain.
When you reach the other end, repeat from *.
Slip stitch into the next stitch (which is the first sc of the foundation chain). Ch 1. *Sc into the back loop of every sc for next 8 remaining stitches. Increase for next 3 stitches to create the round*. Repeat from *. Now sc into the ch1 you made at the end of the previous row, and continue with the woven stitch in a spiral from there.  So the first row of the woven stitch is worked into the last row of the base, and note that since it is a woven stitch it is done the normal way, not into the back loop.

The chainless foundation: : http://makezine.com/craft/how-to-chainless-foundation-for-single-crochet/

Save